Importing images

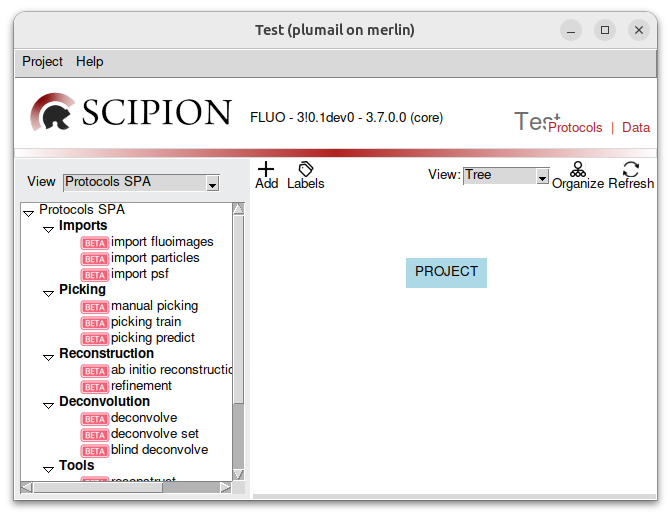
What you see on the left is all the protocols that will populate our workflow. We have:
imports protocols, used to imports stuff inside the software.
picking protocols, to detect particles in the images.
reconstruciton protocols, to reconstruct a model.
deconvolution protocols
tools, a diverse set of algorithms.
First, download sample data here (6.6 GB) and extract it.
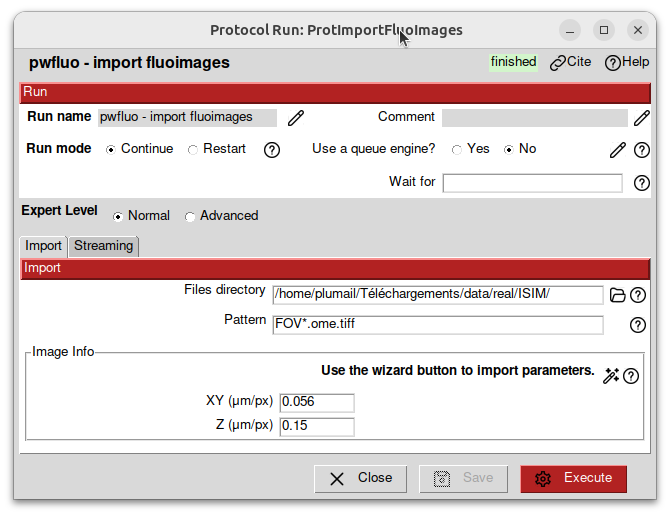
Then, double-click on the protocol import fluoimages. It should open a window.

In the Files directory field, select the data/real/ISIM folder. This folder contains the data you will be working with:
data
└── real
    └── ISIM
        ├── FOV_90_MMStack_Pos0_zstep0.15_t000001_c1_decon.ome.tiff
        ├── FOV_91_MMStack_Pos0_zstep0.15_t000001_c1_decon.ome.tiff
        ├── ...
        └── psf.tiff
The images to import are named FOV_XX_MMStack_Pos0_zstep0.15_t000001_c1_decon.ome.tiff. To match them, we fill in the pattern field with FOV_*.ome.tiff. This will match all the files that starts with FOV_ and ends with .tiff.
The images have a pixel of size 56nm x 56nm x 150nm. We fill in the acquisition infos in micrometers accordingly.
Note
The wizard button can be used to retrieve the infos from the metadata of the images. However, it will not always work! (it works for our images!)
While OME-TIFF format is well supported by spfluo-app, other TIFF formats might not be well read: for instance, the Z dimension may miss, or may be replaced by a temporal dimension. Channels dimension might be swapped with Z dimension.

Then, click on Execute.
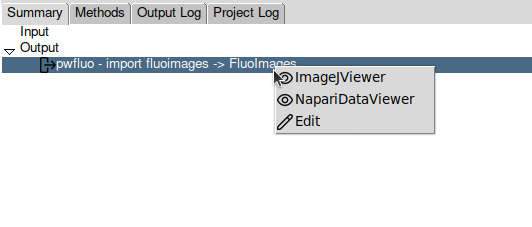
After some time, the import should be done and the protocol box should turn green. On the bottom of the screen, a panel is summarizing the protocol. In the Output section, a SetOfFluoImages object is displayed. This object represents the images you imported. You can right-click on it to see the available viewers.

Note
Almost all the protocols you will output objects in the Output section. You can visualise them with any of the available viewers.
Visualise the data you imported with napari in the next section.